Windows
⬇ Download Scani5 Agent (Windows)
Agent Installation Guide For windows
1. Manual Installation Steps For Windows
-
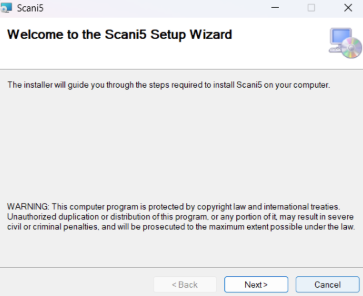
Using Installation wizard
Kindly follow the below instructions to install the Scani5 – Agent manually in individual systems
-
When installing Node.js, you are recommended to check all checkboxes related to dependencies. The docs version dropdown appears in your navbar:
-
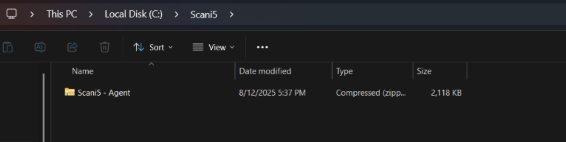
Now select the Release folder inside the extracted zip file & double click on the MSI file, installation wizard pops-out.
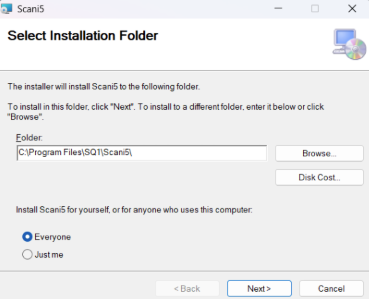
- Browse & select the installation path or leave the path as default and leave the Install users to ‘Everyone’
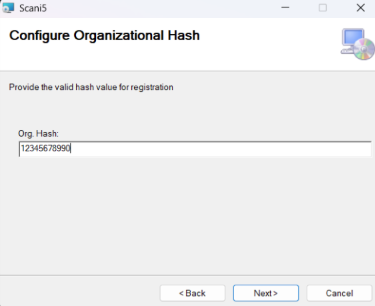
- Enter the valid Org. hash provided during the registration
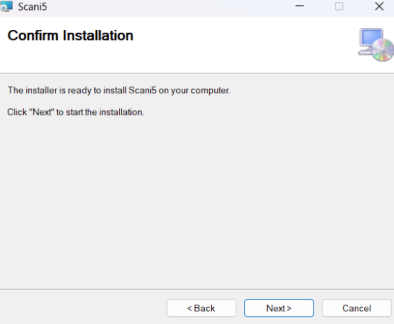
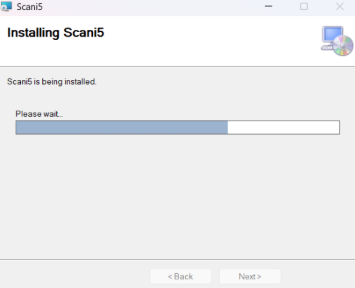
- Click the ‘Next’ button upon successful installation
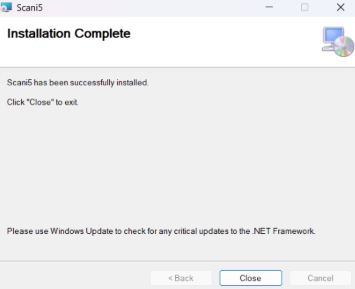
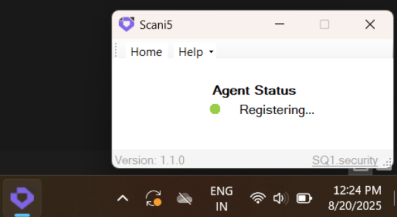
- On successful installation, will get the below screen. Click Close & proceed.
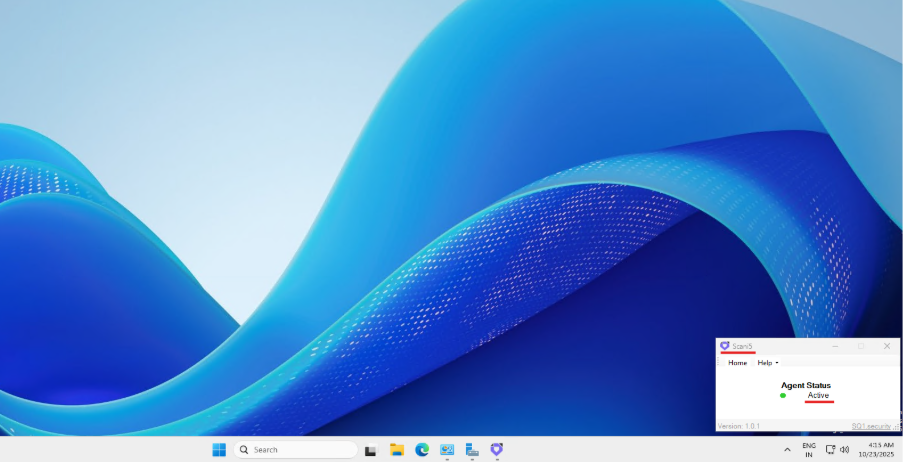
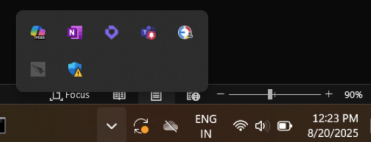
- After successful installation, the agent will start executing in the tray, on opening the application from the tray, the below application screen will display
-
-
Using CLI Command
-
Open Terminal in Admin Mode
- Run Command Prompt or any terminal with Administrator privileges.
-
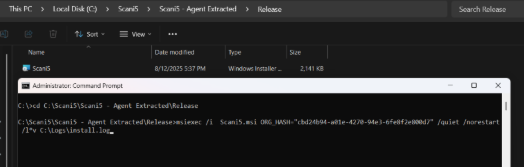
Navigate to the Agent Path
- Use the
cdcommand to go to the folder where the extracted MSI file is located. - Example:
cd C:\Scani5\Scani5 - Agent Extracted\Release
- Use the
-
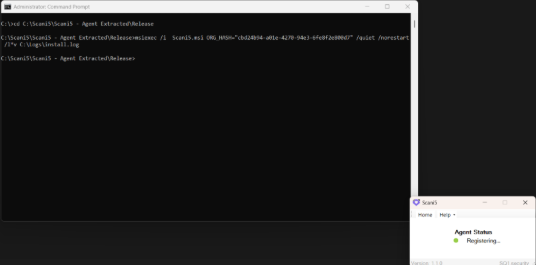
Run the Installation Command Execute the following command (replace the Org Hash value with the one provided during registration):
msiexec /i Scani5.msi ORG_HASH="---provided Org. Hash value---" /quiet /norestart /l*v C:\Logs\install.log
2.Active Directory Installation Steps For Windows
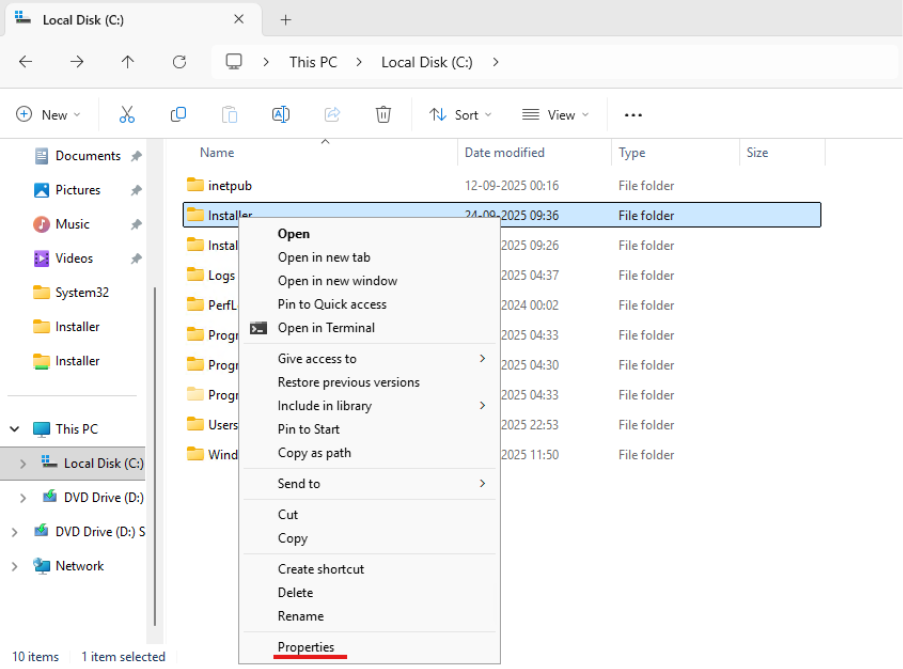
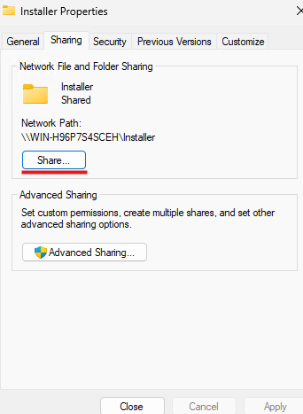
- Share the Scani5 Installer in a network. To do that, right-click on the Installer Directory > Properties > Sharing.
- In the sharing session, click Share.
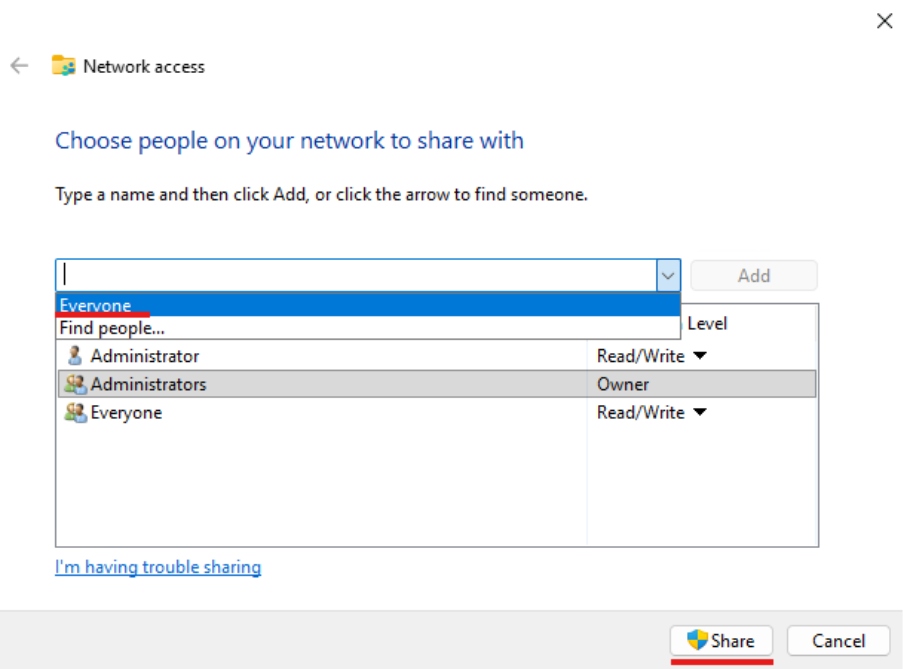
- Select Everyone and then click Share.
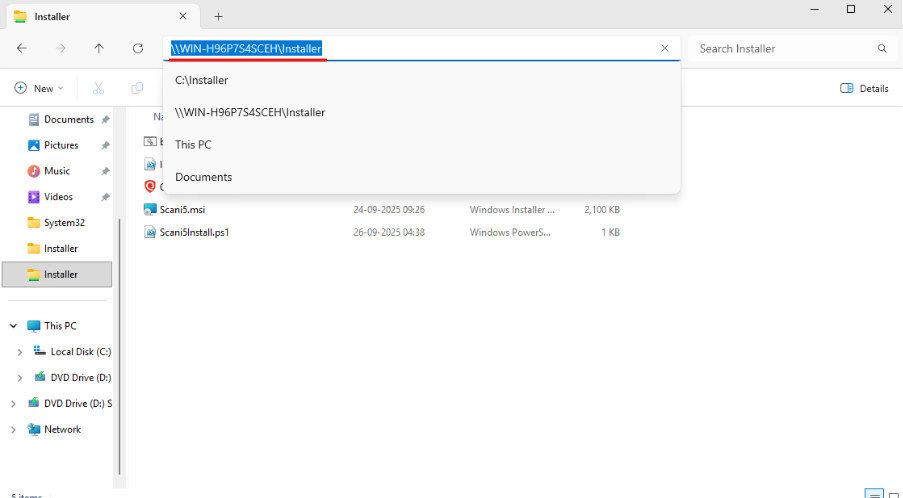
4.The Installer Directory is now network discoverable.
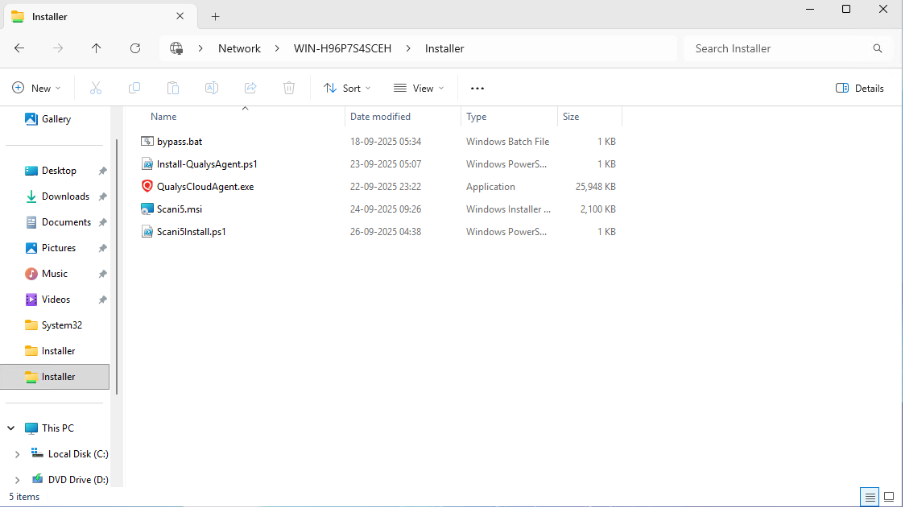
5.You can get the network shared directory location from the Address Bar of File Explorer. Here it is “\WIN-H96P7S4SCEH\Installer” and add “\Scani5.msi” to the address to make it a full working address. It will look like this “\WIN-H96P7S4SCEH\Installer\Scani5.msi”
-
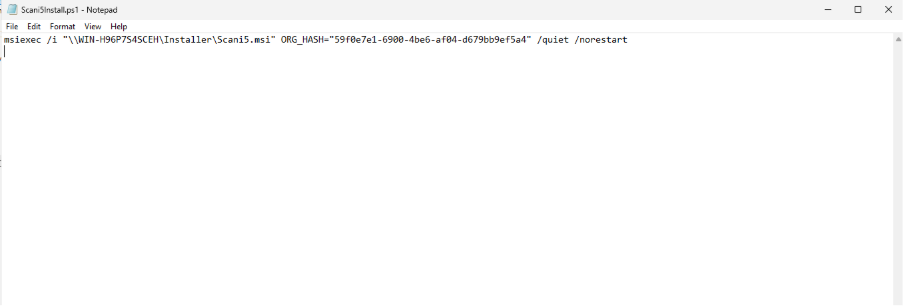
Create a Powershell script .ps1 file using notepad and add the code in it, save the file as Scani5Install.ps1 (can keep any name as you wish).
Code:
msiexec /i "Network Shared Directory where the Scani5 Installer is present .msi" ORG_HASH="Scani5 Org Hash value" /quiet /norestart**
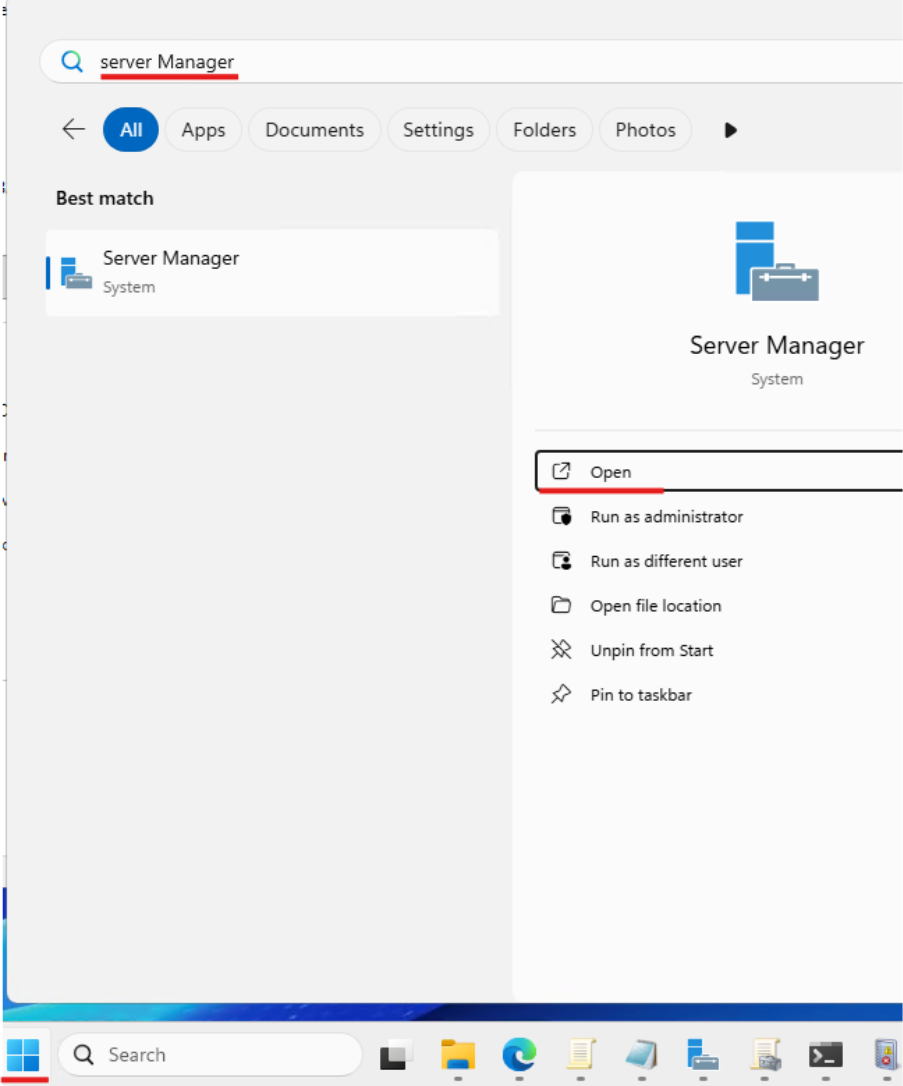
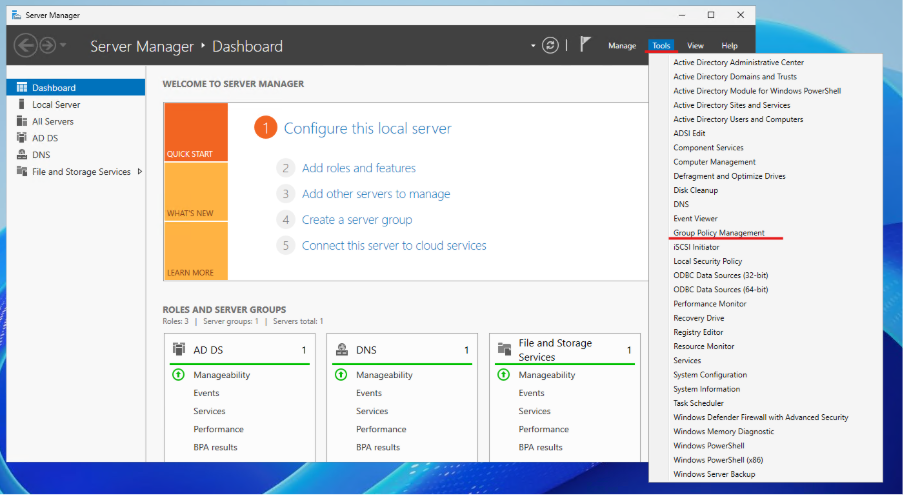
- Now Click on Windows Logo and search for Server Manager, then click Open
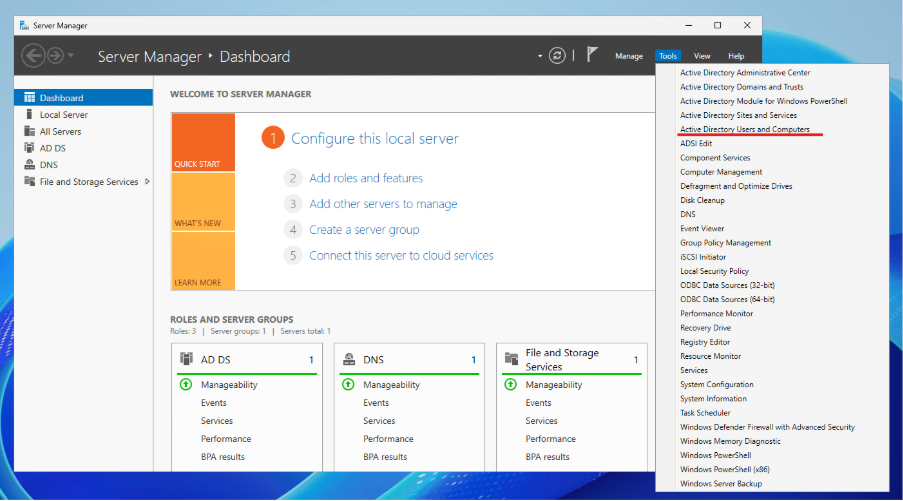
- Click on Tools > Active Directory Users and Computers
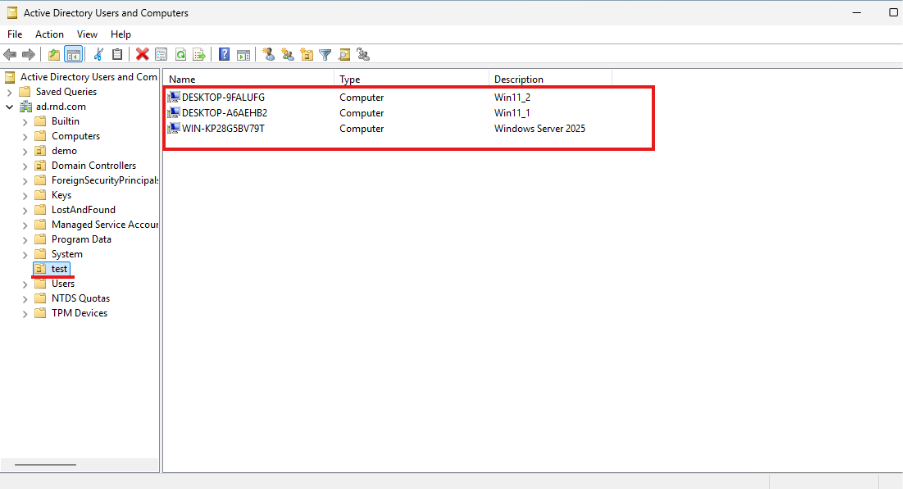
- Check for the PC which is configured already in Organizational Unit “test” under the Active Directory
- Now again in the Server Manager Click Tools > Group Policy Management (GPO).
- In the GPO click Create a GPO in domain and link it here
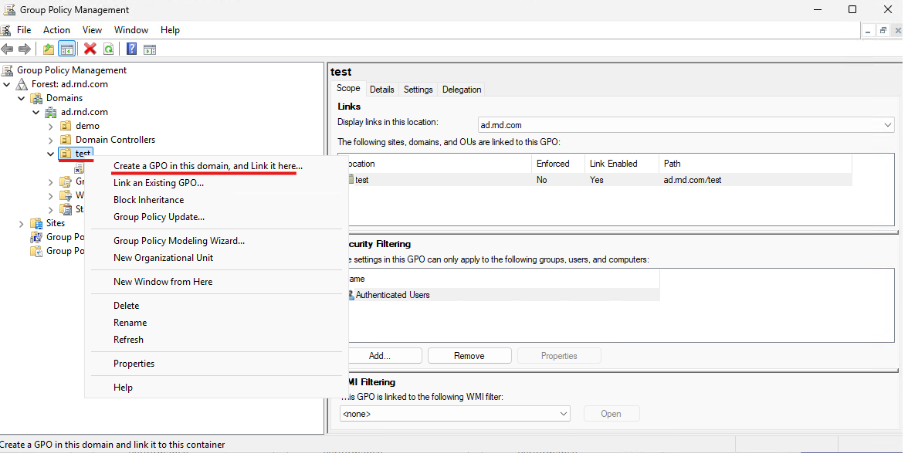
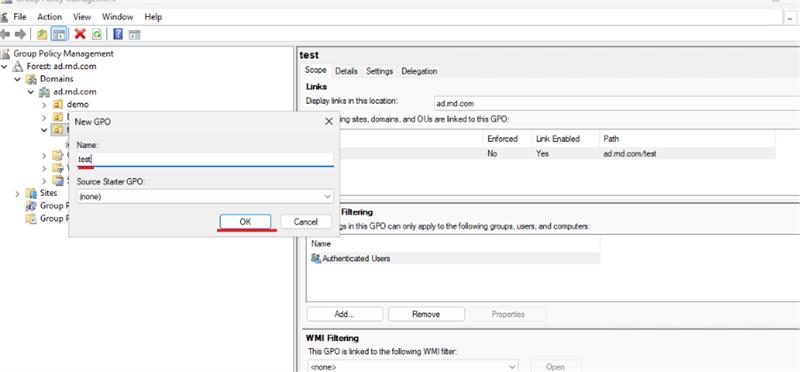
- Give the name as a test and click OK.
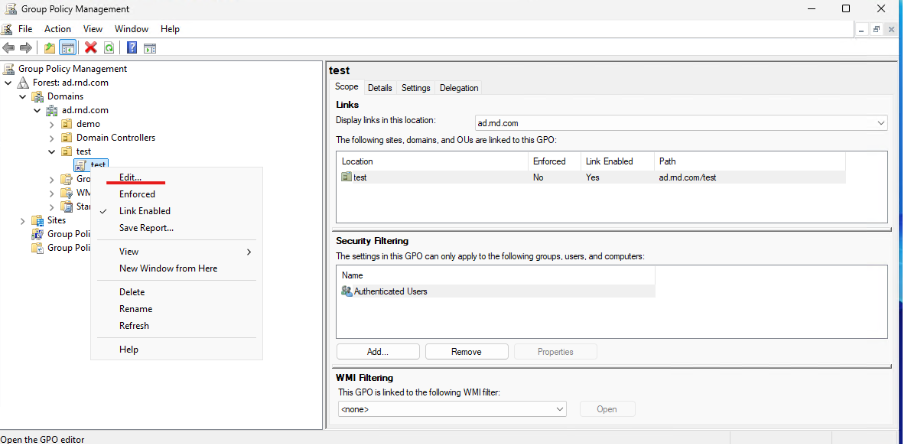
- Now the test policy is created; right-click on the test policy and click Edit.
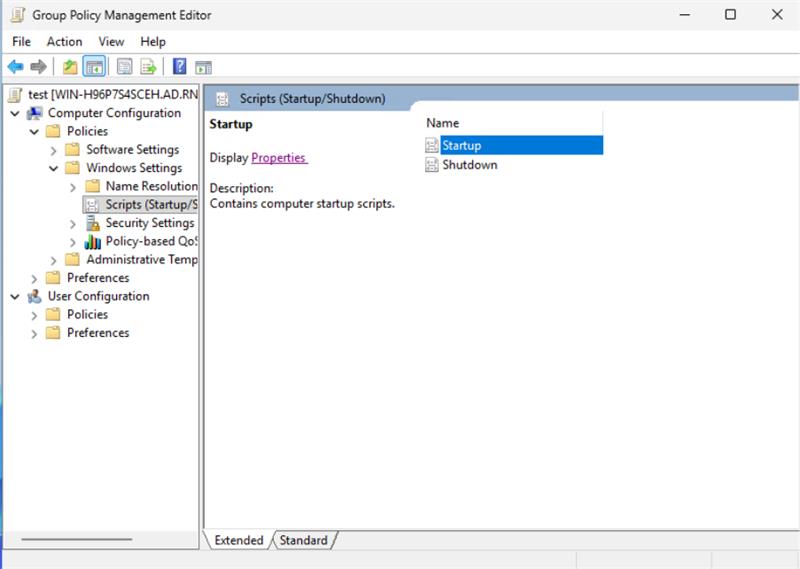
- Now go to Computer Configuration > Policies > Windows Settings > Scripts (Startup/Shutdown) > Startup.
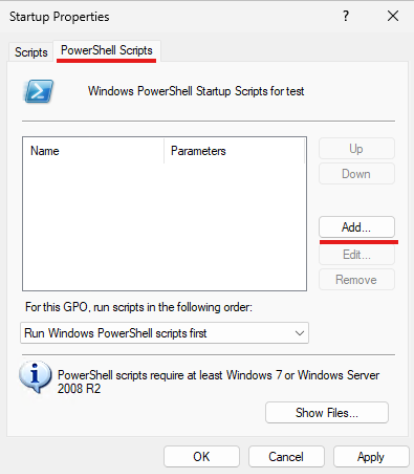
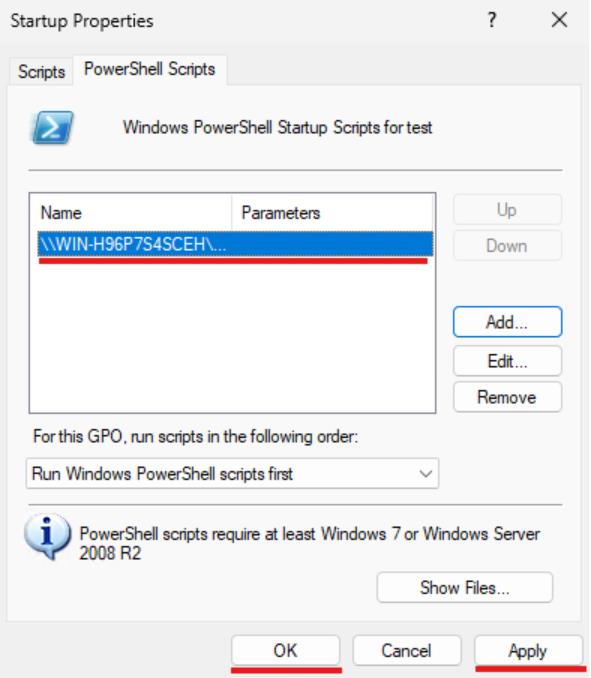
- Double Click on Startup Properties select the PowerShell Scripts and click Add.
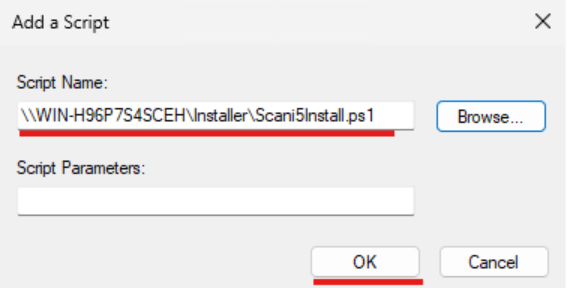
- Click on Browse.
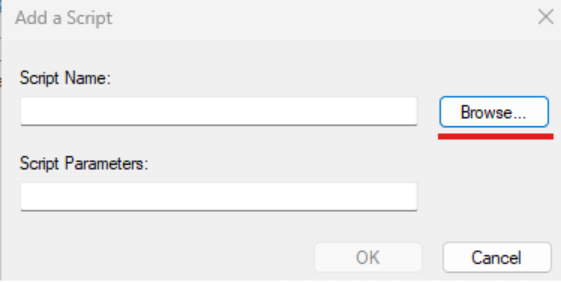
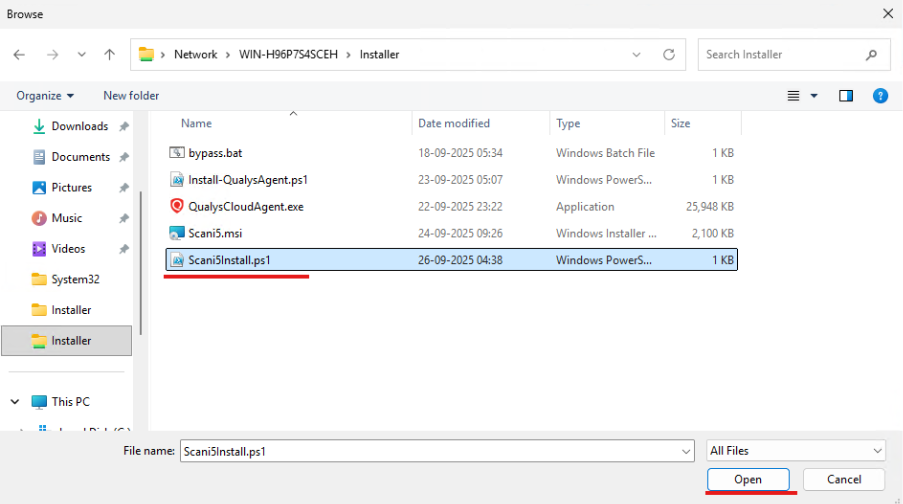
- Select the Scani5 script (Scani5Install.ps1) and click Open.
- Now the PowerShell script has been selected, and then click OK.
- Click on Apply and then press OK.
- Then again go to Computer Configuration > Administrative Templates > Windows Components > Windows PowerShell > Turn on Script Execution

- Select Enabled and on Execution Policy select Allow all scripts. Now click on Apply and then click OK.
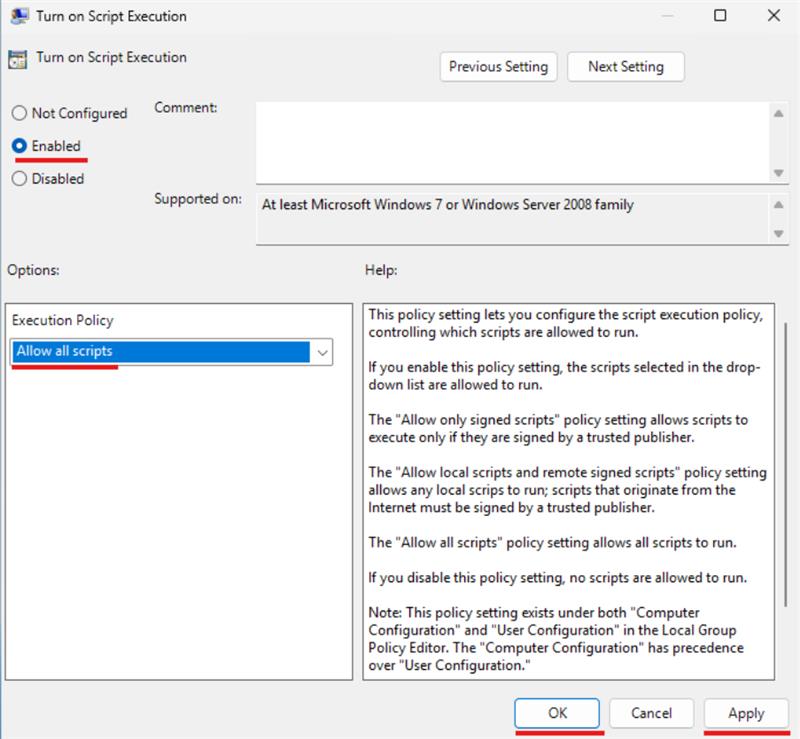
- Now we can see The Turn on Scription Execution option is Enabled.The script should be working fine.

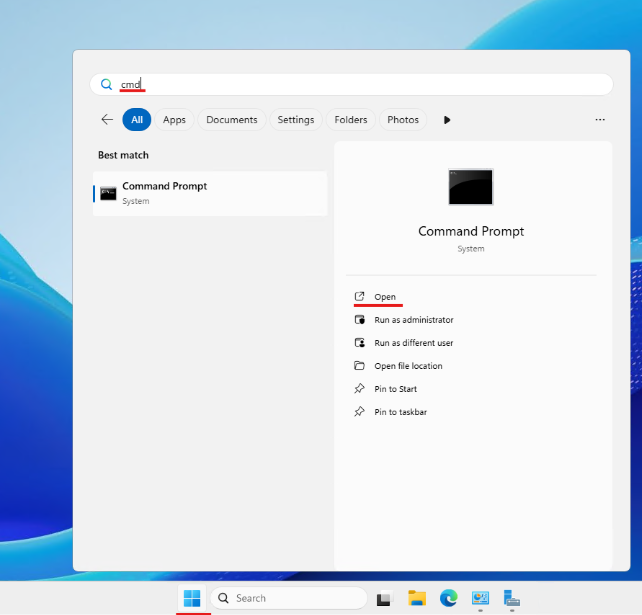
- Now from the Client PC click Windows Icon and Search for cmd.
- Pushing Scani5 Application through AD.docx
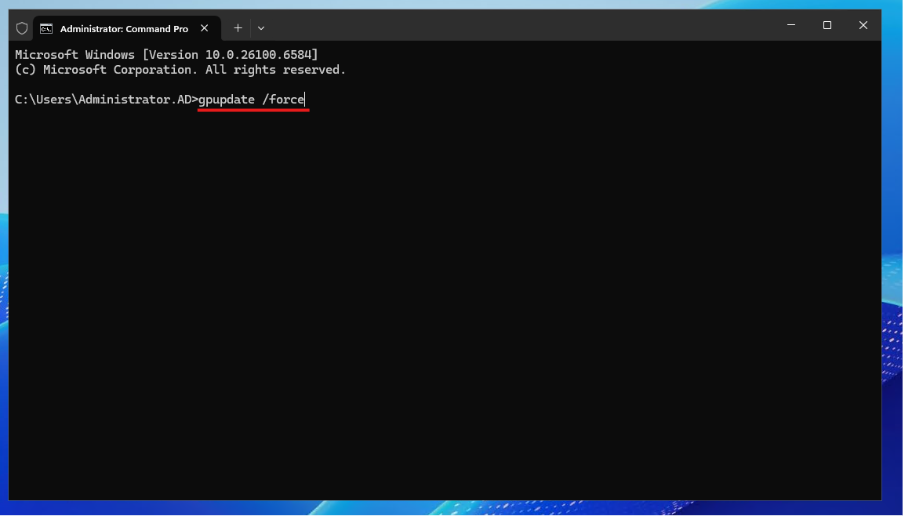
- After the system restart please wait for the few minutes and we can see the Scani5 application has been installed successfully and starts running.